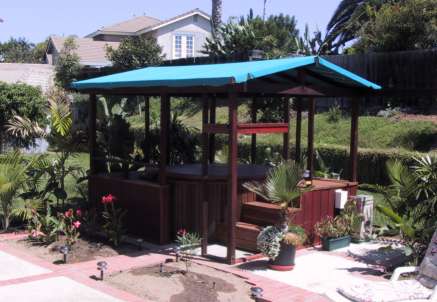
The Jacuzzi Rehab Project - June, 2003One of the projects we did this year was to rehabilitate and landscape the Jacuzzi. We had seen many pretty gardens and things around pools and spas in our Travels to Jamaica and we wanted to create an area reminiscent of some of those sights. I decided to do this at the same time as the Tree Project so as to get as many plants in the ground and growing as soon as possible. Before
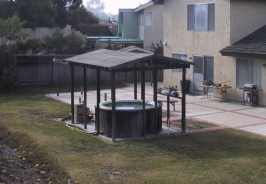
In the above picture you see the Jacuzzi as it stood just before this project. In the year I had been here, the plywood structure had gotten no better looking, to say the least. Below you can see the structure as it existed when I first moved in. Note the messy plumbing and water leak. One day the pump went out and so began the project.
The DeckI ordered a pump and a new "dome" for the filter on the internet to fix the leaks, and began designing the deck. I made a number of drawings, some utilizing the existing structure and some starting over from scratch. When we stripped the plywood off, the underlying structure wasn't too bad, so I decided to keep it. I think it was a good decision, because the project has been time consuming, yet still relatively inexpensive, as it is.
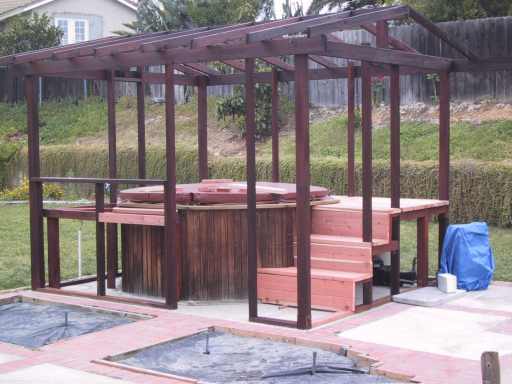
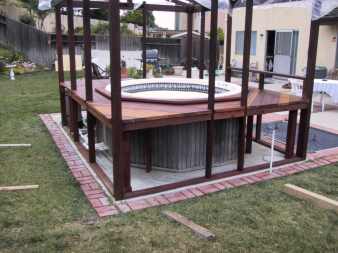
Above you can see the structure after I cleaned and bleached it with Oxacylic acid and added the basic framing for the steps and deck. I tried to use pressure treated wood as much as possible in my structural additions.
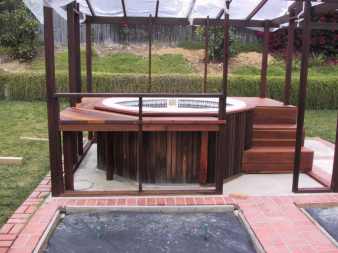
I ended up spending a lot of time Sealing and Painting the deck. In the pictures above and below I have sealed the infrastructure, as I did most everything, with a heavy duty oil based Sealer and Weather proofer, and am in the process of cutting and fitting the steps and deck pieces. I decided to use redwood because it is so beautiful, available, and easy to work with.
Each piece of decking, as well as the skirting, trim, and so on, was cut to fit, sanded, and completely sealed before it was assembled to the deck. Then after it was assembled, another thick coat of the weatherproofing sealer was given to it. I used clear sealer on the redwood. The deck is largely held together by 2" and 3" "deckmate" screws.
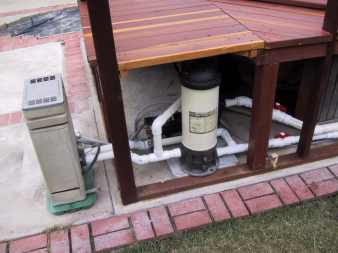
Plumbing and SkirtAfter the deck was done, I turned my attention to the plumbing. In addition to the pump, and that "dome leak", the thermostat in the heater didnt work. I got a thermostat off the web, but they don't make the heater anymore and I had to modify the heater slightly to get a near-replacment to fit. That took nearly a whole day.
Above you can see the replacement plumbing. Part of the deck lifts up (and a section of skirt is removeable), to allow access to the plumbing. Since it's a gas heater, it still has to be outside, but I managed to get the rest of the mess under control and into a neater configuration. I redesigned and re-did all the PVC tubing and valves. There are no leaks. The neatest engineering work was in the repair of the jacuzzi light. It's just a 12V bulb. It turns out that both the switch in the jacuzzi and the transformer in the electrical box were burnt out; the switch because it was near water, and the transformer because it was left on 24/7 (like a wall wart). I decided to replace them with an "air button". So I got an air acutated switch (rated at 20A/117v), put THAT in the box to control a new 12V tranfsformer, and replaced the wiring with an air tube and a new air button mounted in the jacuzzi. It works great and is safer and will last longer than the other system (since the transformer is now only on when the light is on, duh).
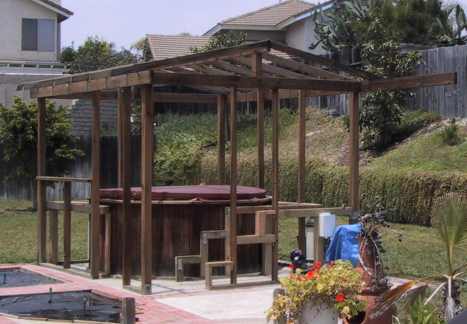
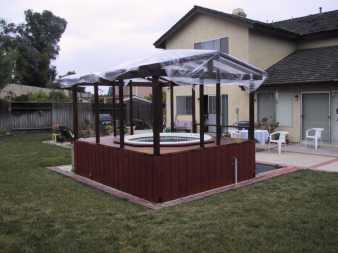
Finally, in the above picture I cut and sealed the skirt pieces, assembled them and sealed the whole thing one more time. After the above picture was taken I also added corner and trim molding, sealing it inside and out as well! The GardenAfter nearly 3 weeks on the deck and plumbing, it took me about another week to get the garden done. I hired some local labor to help dig the basic garden down about 8 inches around the jacuzzi. There was nearly a yard of rocks in the 3 yards of material I'd say we removed around the deck. It was hard work.
The best of the dirt from the garden was thrown up on the bank around the avocado and orange trees to build up mounds. I had a haulding service come pick up the other two yards. I reworked all the sprinklers around the jacuzzi so that there was a set for the lawn (on the outside) and a set for the garden (on the inside). There is also an important 4" drainage pipe system that goes around the whole patio that I re-set into over 1/2 yard of gravel. But you can't see any of that! Unfortunately (or not), I didn't get any pictures of the "garden in progress".
After that, I worked furiously bringing in the 20 plants and 2 yards of topsoil. I ended up having to rent a truck and buy a wheel barrow in order to get the topsoil I wanted. I spent a full day just putting plants in the ground, and another one, cleaning the backyard.
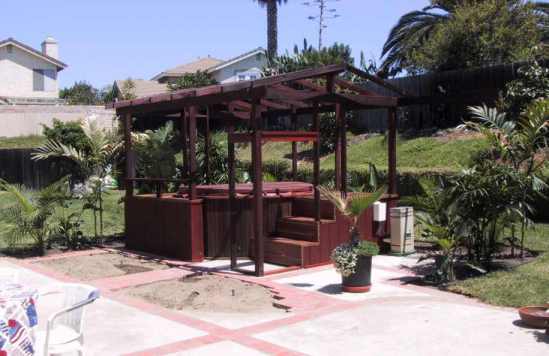
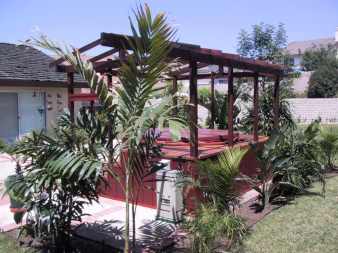
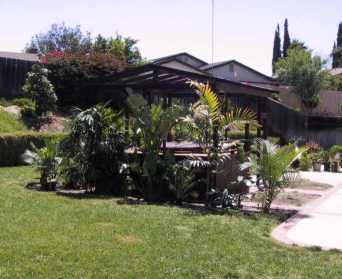
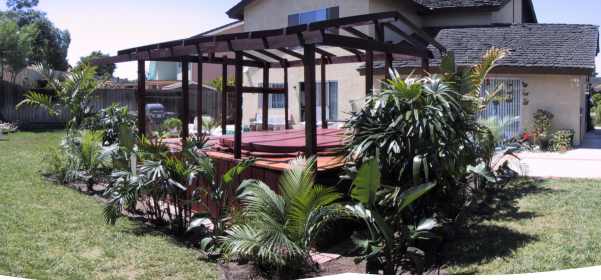
In these pictures, you can see 6 different kinds of plants around the jacuzzi. There are 5 or 6 Birds of Paradise, including one large 30 gallon plant, that's already 8' tall. There are two large 8' Christmas Palms, also known as "Manilla Palms". There is one large and two smaller Rhapis palms, that have dense arrays of pretty fronds and interesting stalks. There are 3 or 4 Majestic Palms, some good sized ones, and 3 or 4 Pygmy Date Palms, and one unidentified, but interesting looking little palm like plant.
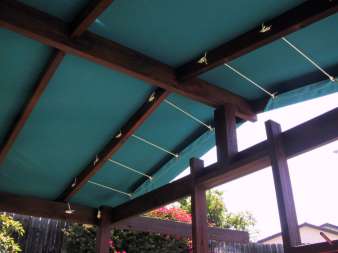
CanopyI also created a custom canopy for the structure. I bought the 13 yards of raw "Sunbrella" UV treated fabric, 50" wide to create one large sheet. Then after much debate I decided on the shown design. It was a major sewing project! I have found I love the jacuzzi topless at night, so you can see the stars, as it is possible to untie and "throw back" the cover if one so desires.
We also planted some more plants in the front. There are 6 "Cannis" (not sure of name or spelling) and single Oleander bush. We think that, overall, the jacuzzi is now a lot nicer that it was, and with a few years of growth, the plants and the surrounding trees will create a wonderful scene of tropical serenity.
|


