Studio - Attic and CeilingThe work actually started in the attic. The attic consisted of insulation lying on the drywall that was the ceiling of the studio, and then an air space, then the plywood that made up the roof. So all told, in the attic, the only thing stopping the sound was 1/2" drywall, a little insulation, and 3/8" plywood. It’s a shame that I didn’t take any "before" pictures of the attic. However, here’s some "after" pictures. 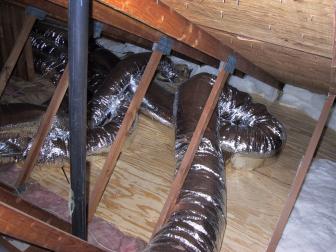
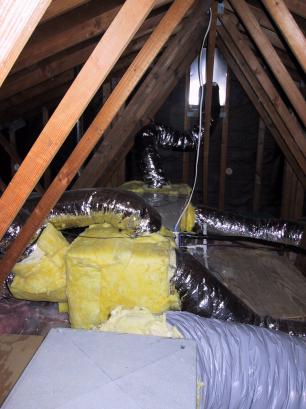
I glued-and-screwed 1/2" plywood onto the floor of the attic above the band room, insulated the roof and walls, and then screwed 3/8" plywood to them. I also used 1/2" drywall in some places. All cracks were sealed with flexible silicone caulk. The air-co guys installed the blower unit and ran the piping to the ducts in the various rooms. Once again, it’s hard to explain how much hard work went into the attic above the studio. All the materials had to be cut down to 2 ft sections that would fit thru the portal to the attic, and hauled up from the ground floor the second floor, then hauled up a ladder to the attic, and maneuvered around in the tight spaces there. In the end there were 8 full sheets of 1/2" plywood, 6 sheets of 3/8", 2 sheets of 1/2" drywall and a whole pallet of insulation cut down and man handled in that way. It was nearing summer and the attic would often be 105 degrees or hotter, and you could only work for a couple of hours before nearly passing out. The glue and caulk was a mess, there was no room to swing a hammer, and you would get little holes in your head from bumping up against the roof nails. I was itchy for a several weeks from the loose insulation and breathing the fiberglass and dust was injurious to say the least. When it was all done I had added 2 more layers of plywood and a layer of insulation, and almost a 1000lbs of mass to the attic. Plus I had sealed off all of the air leaks that would let sound out, so I think the work significantly helped the sound-proofness of the final studio. Studio - Gabled Roof and Window BoxBefore starting on the studio, I yanked the carpet and padding and threw them out the front window. I saved the carpet, but threw away the padding. As I mentioned, there was this odd shaped gabled roof at the front of the room. Above the window was, the best way to describe it, a hollow box. I cut into the walls of the hollow box and stuffed it full of insulation. Also hard to explain is the area behind the attic wall shown in the photo above. It was another empty box which was stuffed full of insulation before this picture was taken. Finally, before this picture was taken, we got a "drywall lift" and added a layer of 1/2" drywall and a layer of 1/2" sound board to all interior surfaces. Every time I'd add a layer of drywall or soundboard, all the gaps were sealed with silicone caulk. I then built a "drop ceiling" into the gabled roof. Below you can see one of the two 4x4s and the 2x4 rafters for this new ceiling. Note the air conditioning duct tubing that comes out of the attic. 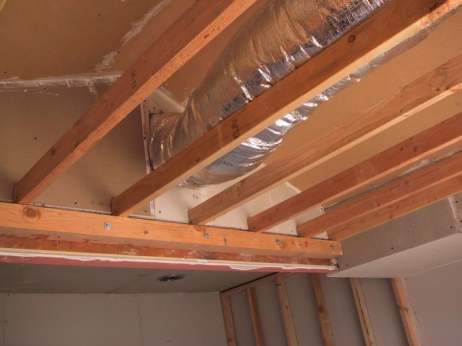
After this photo was taken, I topped the rafters with 3/8" plywood and stuffed the whole space full of insulation. More insulation was then placed between the rafters and 1/2" drywall was put into place for the ceiling. Later, in the finishing of the room, two more layers of 1/2" sound board were added. Note that there were two kinds of soundboard used in the studio, the brown stuff, shown above is very light and easy to work with, but doesn’t really do that much for sound-reenforcement. The grey stuff, shown in other photos below, is very heavy and provides much better sound-insulation characteristics. |