New Propeller Shaft, Cutlass Bearing, and PSS Shaft Seal
The first thing John did was pull the old propeller and shaft so that it could be
measured. It was a 30mm shaft (metric), and, much to my dismay, would have to
be special ordered and take weeks to replace. After some discussions, based on
Bill and John's recommendations, we decided to replace the metric shaft with a
standard 1.5" U.S. shaft, which was more available, and would make
future work easier as well.
Of course, this means that we had to rework the bevel on the inside of the
Max-Prop folding propeller. After some more consideration, we decided to
also have the propeller factory-reconditioned, as the distributor would be the
best choice to rework the bevel, and they could also completely recondition
the propeller at the same time. So we shipped the propeller up to Seattle,
Washington, the day after the haulout, expecting it to be shipped back
within a week.
At the same time, we commissioned a machine shop in Wilmington, California
(a suburb of Los Angeles) to machine the new shaft. Even though it was stock material, it had to
be cut to length and the proper bevel put on it. So, also on the 2nd day,
the shaft itself was shipped (via truck) up to L.A.
We also replaced the old Volvo Shaft seal with a new PSS
dripless shaft seal, and of course put in a new cutlass
bearing and so on. John handled all the work of rounding
up parts, making sure they were compatible, and installing them.
By the following Monday (one week after the haulout), the new shaft
was in the boat, ready for the propeller.
Factory re-conditioned Maxprop Propeller
As I mentioned, we needed to have the bevel modified on the
Max-Prop and so we shipped the prop up to the distributor in Seattle.
The prop was fairly worn and pitted, and I knew they would
polish it up as part of the reconditioning, but was not expecting
it to look like brand new when it came back.
Although the pictures may not capture it well, when we
finally got the prop (a week late, it should be mentioned),
it looked great! It was as shiny as a brass clock, and
looked like a brand new propeller.
After the extra week's delay, John and Johnny from WYC put the
new prop on the new shaft. It's kind of technical and they
had to make sure that it was assembled and adjusted correctly.
Above, Johnny is putting the finishing touches on it by
injecting grease into the bearing.
New Thru Hulls and Valves
As mentioned before, the surveyor recommended replacing
several thru-hulls and the water-chest (which can be
seen in a "before" picture on the next page). The old
valves were a variety of metals: some were brass, some
were stainless steel, and so on, but most were corroded.
So I decided rather than replacing them with more metal
that would corrode again in the future, that I would
replace them with all Marelon valves, which
would never corrode.
Once again, John rounded up the parts and did most,
if not all, of the work. In total, we (he) replaced the following
thru hulls and valves.
- Replaced the "Water-Chest" with three new thru hulls and valves
- Replaced the Main Engine Cooling thru hull and valve
- Fiberglassed and epoxied over the old Water Chest hole
- Replaced the Watermaker Input thru hull and valve
- Replaced the Kitchen Sink Output thru hull and valve
- Replaced the Port Head Waste Output thru hull and valve
- Replaced the Starbord Head Waste Output thru hull and valve
- Fiberglassed and epoxied over the unsued Master Head Waste Output
- Fiberglassed and epoxied over the unused Crew Cabin Toilet Input
The photos don't show it very well (see next page for more), but there
was actually quite a bit of work done to get all the old thru hulls
and valves out and put the new ones in. Once again, John and WYC
did this work poste haste and to the highest standards of quality.
I also had John install the new FLS sensor. There was an existing,
unused and unhooked sonar sensor, and so we reused the hole, although
it had to be enlarged and moved slightly (with epoxy to make up the
difference). Then, finally, as we were about to wrap up the haulout,
at home one night, I discovered a sensor for the ST50
depth sounder in a pile of junk I had removed from the boat
early-on and decided I wanted it put on the boat. So I took it
down to the boat yard at the last minute, and, True to Form,
John had no objections about this last minute additional work.
Quicker than you can say "ST50 sonar depth sounder", he
had it installed on the boat.
Seal and Paint Keel Bolts
The "before" picture below shows the Masthead Compartment (at the foot of
the mast) when we first purchased Rhapsody. George had recommended
that we possibly replace the keel bolt in here. You can barely
see it in the picture because of all the rust and corrosion.
After I had cleaned the compartment up, and particularly the bolt,
I asked John what he thought we should do. He said the odds were
that the bolt could not be taken out, as it would break in the process,
that it was a small bolt, and not really taking much of the load of the
keel, and that it wasn't completely deteriorated.
He recommended that we clean it with Phosphoric Acid and
then paint it with an epoxy based paint,
so that's what we (he) did.
In the "after" picture, above, you can now see the bolt more clearly.
You can also see the new FLS sensor on the centerline.
Bottom Paint, Wax Topsides, Bleach Decks
Finally, of course, or in the beginning should I say, there was the bottom
paint job, since it was actually done BEFORE the propeller was put back on.
(Note that these web-pages of improvements are not presented in a strict
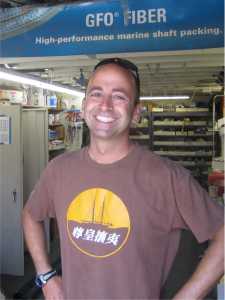
chronological order). And why would I show a picture of Steve Dexter here? Well, yes,
we got the bottom painted, and yes we had the topsides waxed and polished, and
yes we got the teak decks bleached. And they looked great.
But the real story of this time, for me, was that the boat was down at the
Shelter Island Boatyard for 3 weeks, and I was down there nearly
every day, working on projects, hanging out, and learning.

When we hauled the boat out on Monday and sent the shaft off in one direction
(to L.A.), and the propeller in the other (to Seattle),
we thought they would be back within the week and Rhapsody would
be out of the yard by the weekend. But then the propller got hung up
in Seattle, and the boat got stuck in the yard. Then Bill, the owner
of the yard cut me a break and let me store the boat in the
water (at their docks), for an additional two weeks at a reduced rate.
Steve would stop by on his breaks to check out the boat, and was
ever encouraging and honestly interested when I would show him the
latest modifications to the plumbing. Or I might chat with John
on his break about his progress with one of the various boats that
he was working on. Or I might help with the lines for a boat
coming in (as we sometimes had to move Rhapsody and other
boats around to get boats in and out of the yard),
hustle on foot down to see Fred at
San Diego Marine Exchange
for some parts (nearly every day), or find myself chatting with
Wayne about the $10 million yacht that's been there for
2 years, has TWO full time architects AND an Italian interior designer
working on it. Wow! It was a very interesting environment, and there's a lot that
could be learned in such a place.


It strikes me very strongly that there are so many people working
so hard and putting so much effort into these boats. If you
multiply our feelings and the effort put into Rhapsody times the number
of boats and boat owners, the result staggers the mind.
So yes, Rhapsody got a bright shiny new wax job (Steve even
called me to tell me he saw it on break, and it looked great)
And the teak decks look wonderful, though I wish I had a nice
photo of them still wet right after they were cleaned. And
the bottom is coated with Interlux Anti-Fouling paint.
But, for me, the main thing about this set of "Improvements to Rhapsody"
was the people I got to meet and work with during the three
weeks I spent at the Shelter Island Boatyard.